
Starting a VR Collaboration Session (Host)
The following steps will guide you to start VR collaboration sessions
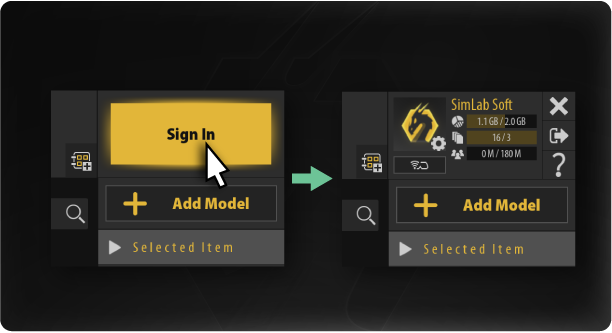
- Open the latest version of SimLab VR Viewer on Windows or macOS.
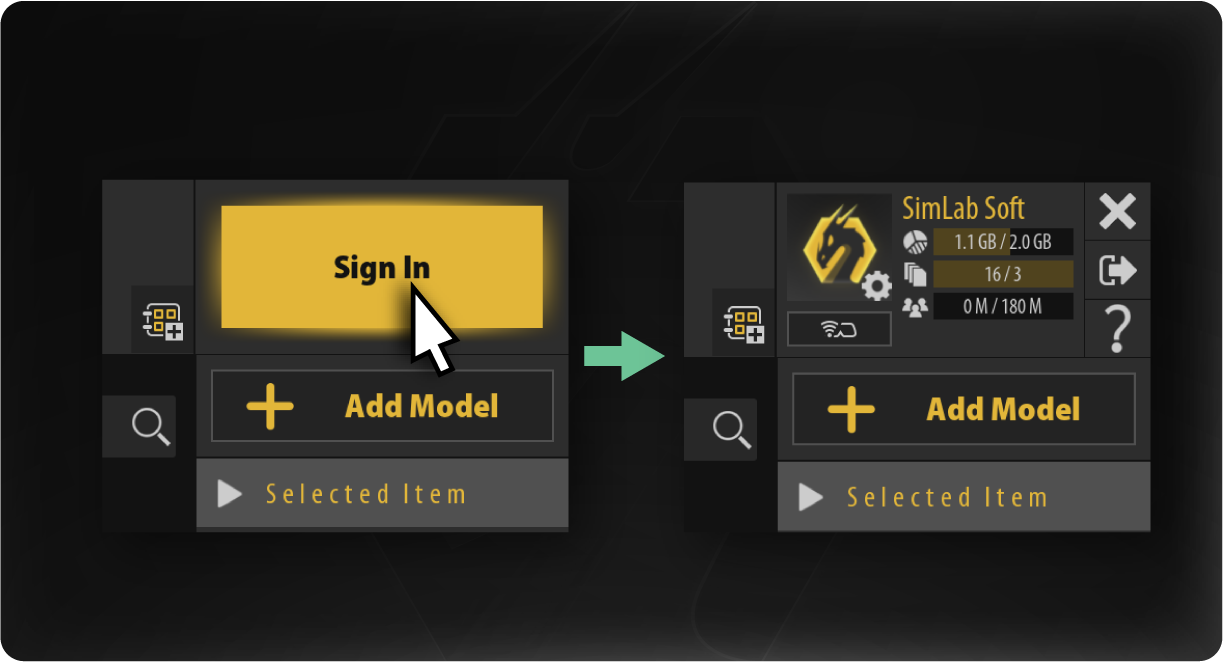
- Sign in into your SimLab account.
- Choose
VideotheoftheStartingfirst VR experience you want to start the collaboration session with. (you can change it later)
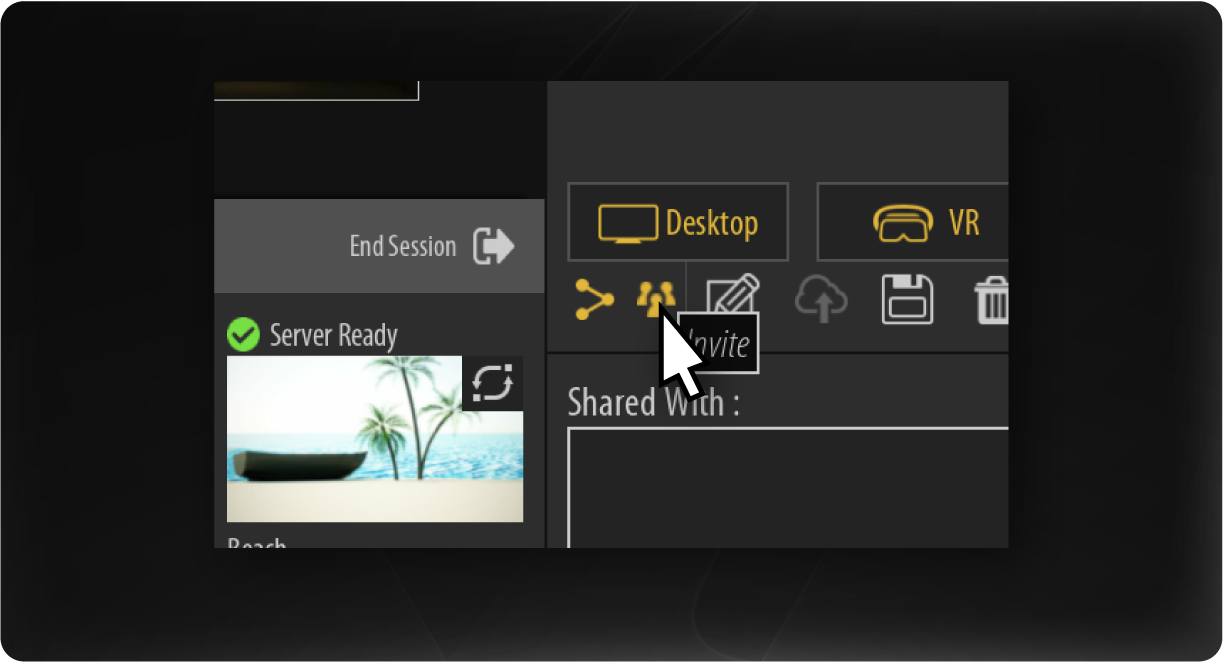
- Click on invite to open a VR Collaboration
Session - Invite
link.Addingyour participants:
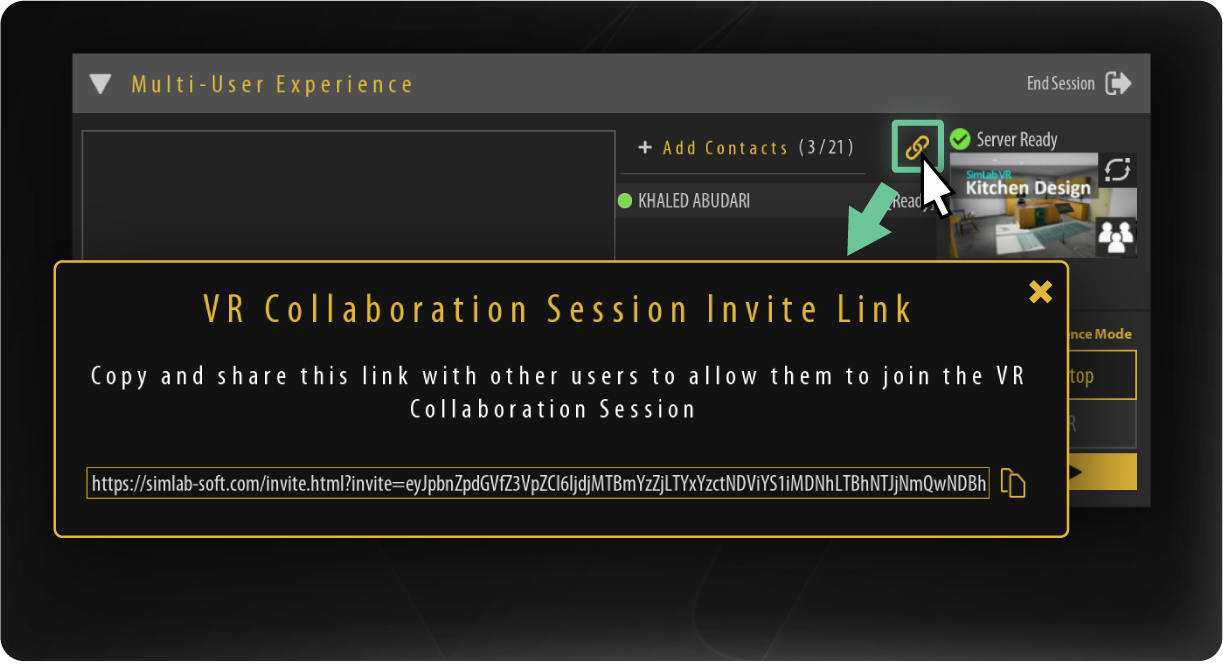
Method A. Invitation Link:
Create an invitation link and send it to others, they will access theVRsessionExperiencebytojustSimLabopeningVRtheViewer
this
andBeforemethodstartingisasupportedVRonCollaborationwindows,session,macOS,youandroidneedandtoiOS.
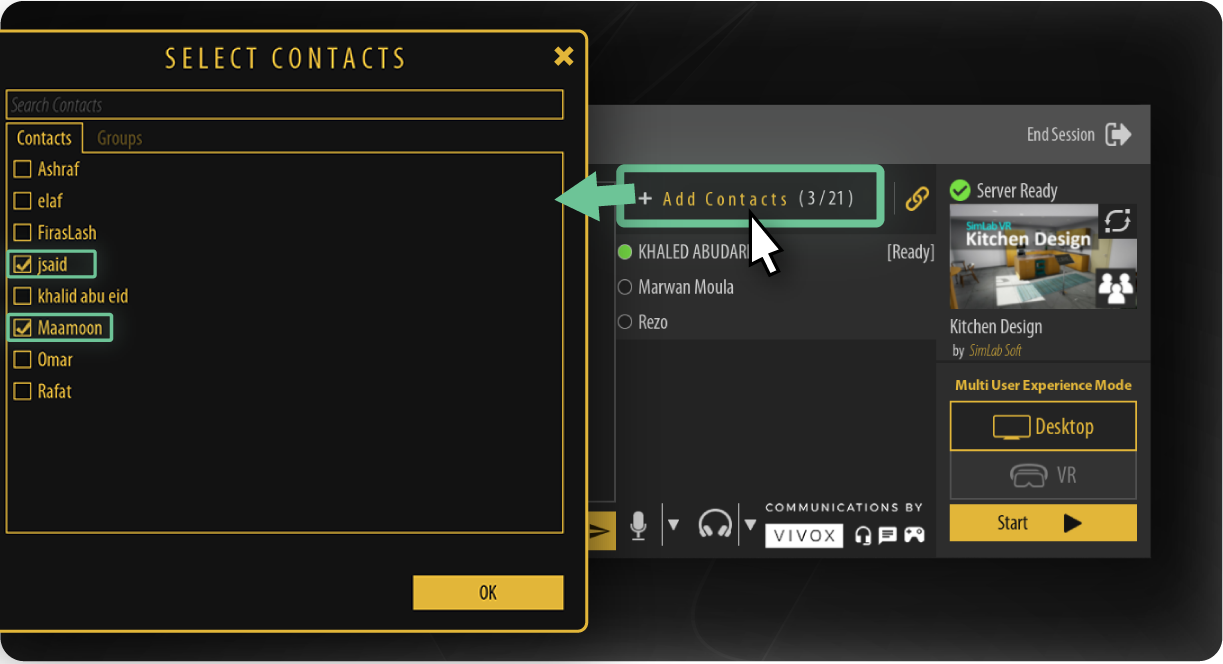
MethodfirstB. Invite contacts and groups:
You can addthecontactsVR Experience toon SimLab VR Viewerwhileforloggedeasy sharing and VR Collaboration invitations.
While intothe lobby you can add participants from yourSimLabcontactsaccount.Togroupcreateofacontacts.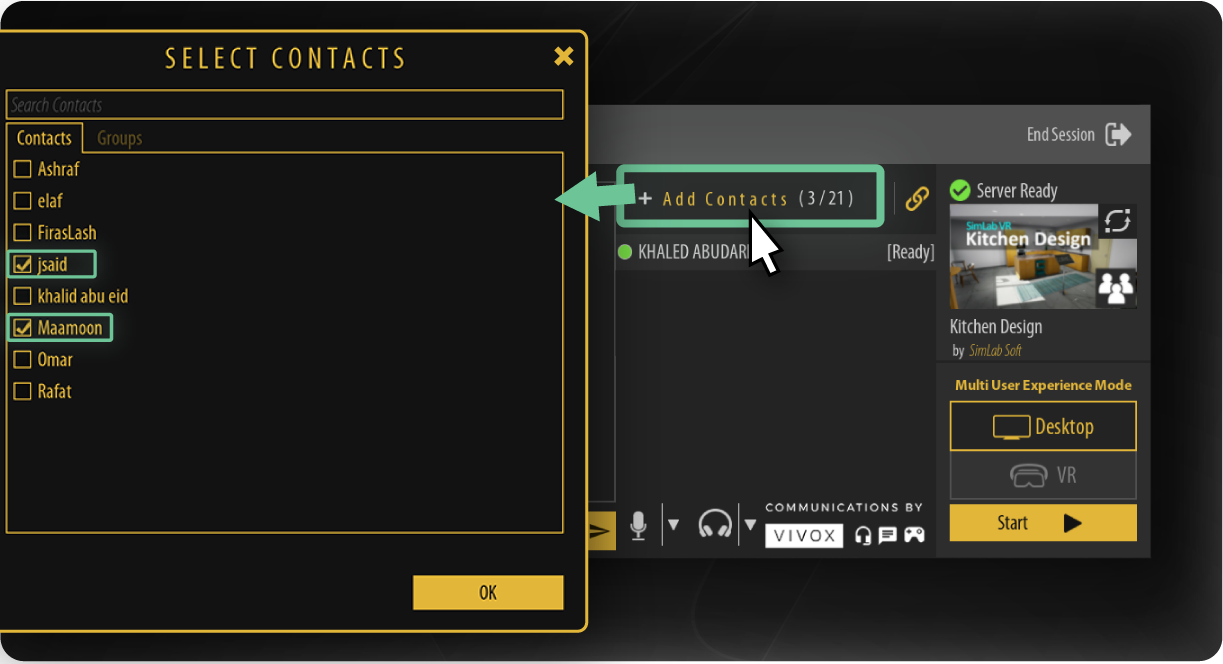
- Wait
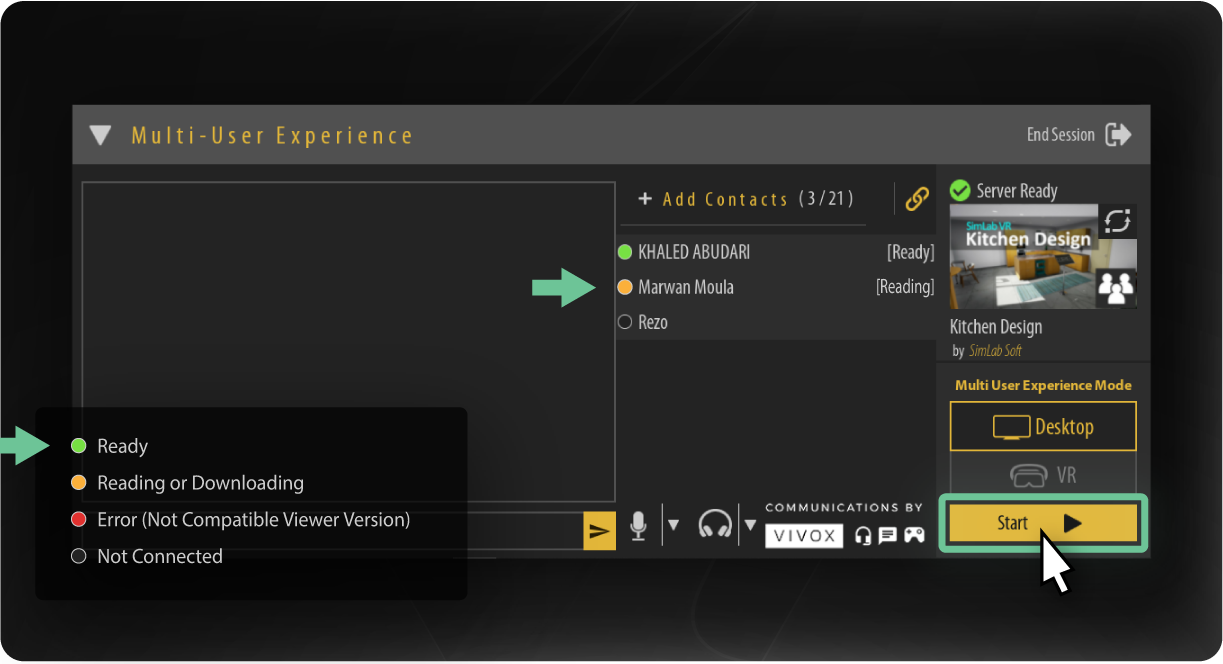
Experienceforfrom SimLab VR Studio, gopeople to join and get ready, Status of people will be shown beside them as described in the following image, then hit theVRStartViewerButton
Tutorial
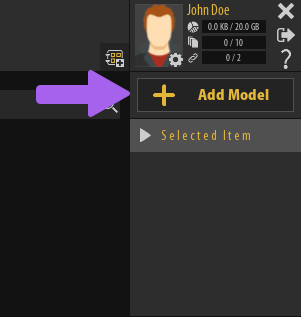
To Add the Exported VR Package to SimLab VR Viewer, click on "Add Model" in SimLab VR Viewer and select the VR package you just exported.
If you want to learn more about adding VR packages to SimLab VR Viewer, click here.
StartingUseful a Collaboration SessionTips
SpecifyingChanging the VR Experience
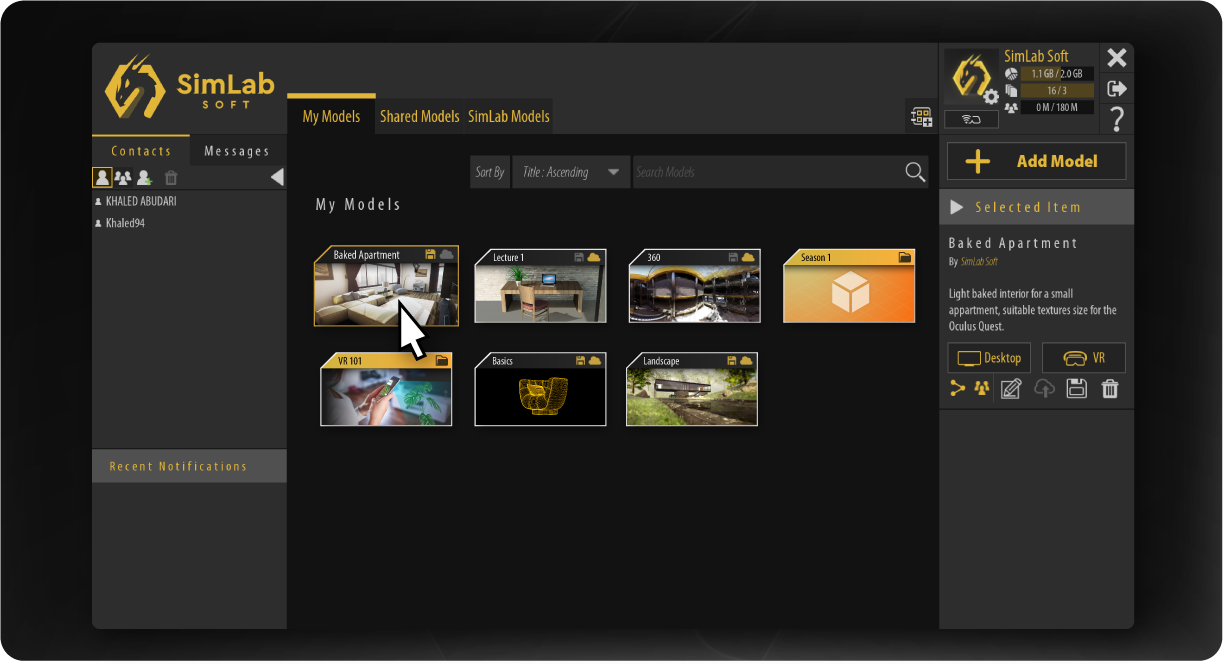
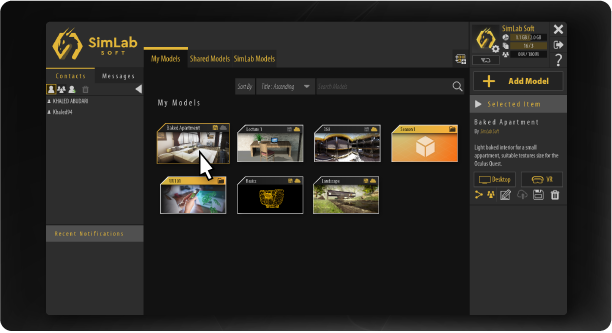
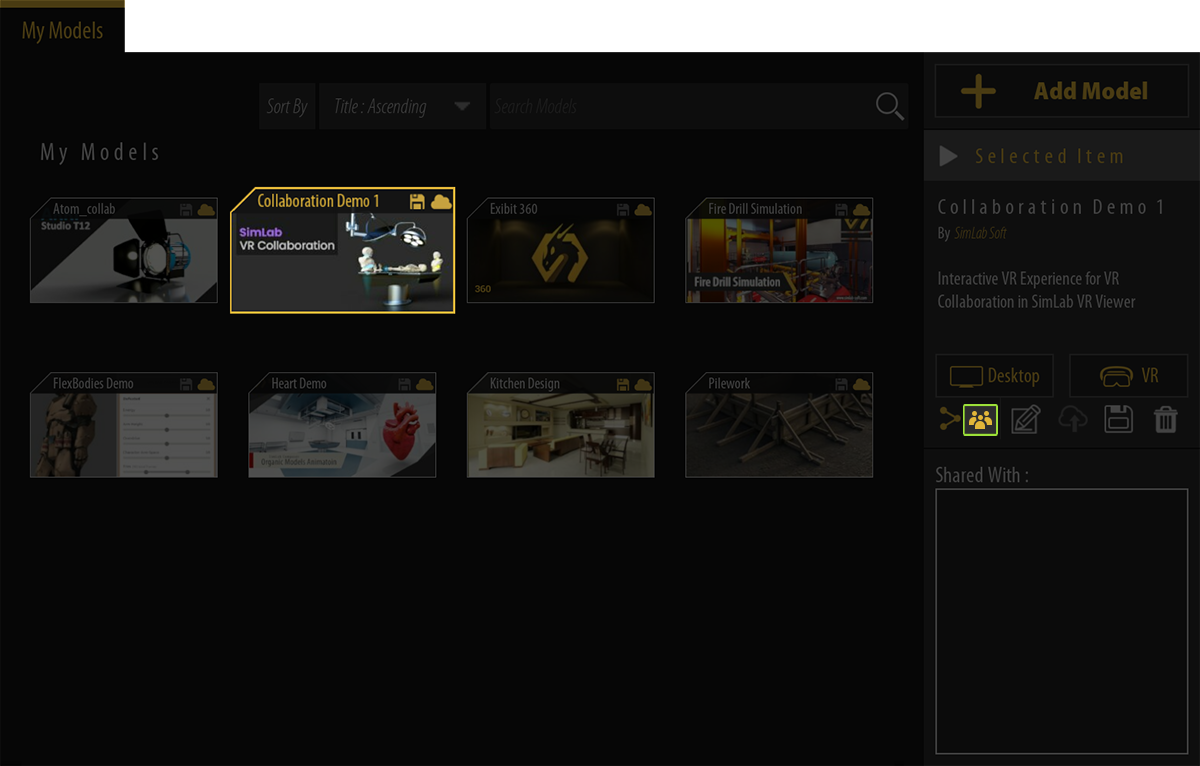
To Start a Collaboration Session in SimLab VR Viewer, select the VR Experience you want to use for the collaboration session then from the Selected Item panel to the right, click on the Collaboration Icon.
Selecting Participants
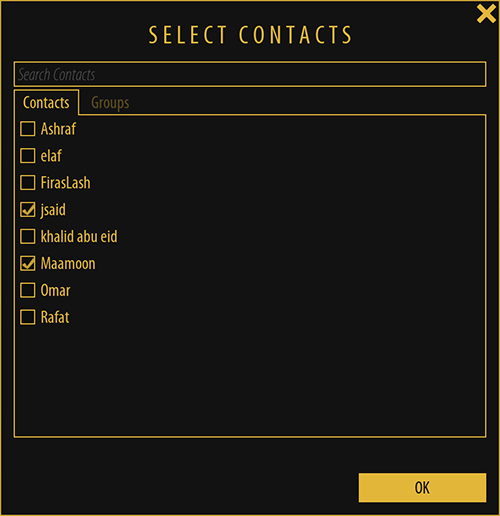
Once you have clicked the Collaboration Icon, the contacts selection list will appear where youYou can select the contacts or groups of contacts that you want to be part of the collaboration session, select the contacts and click "OK" to go to the collaboration Lobby.
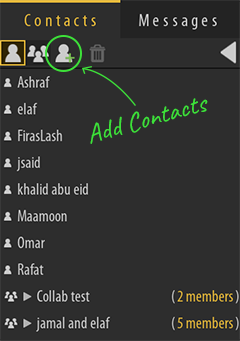
To add Contacts click on the add contacts Icon in the contacts panel to the left, then enter the contact's email and click Add.
If you want to learn more about Adding contacts and creating groups, click here.
Collaboration Lobby
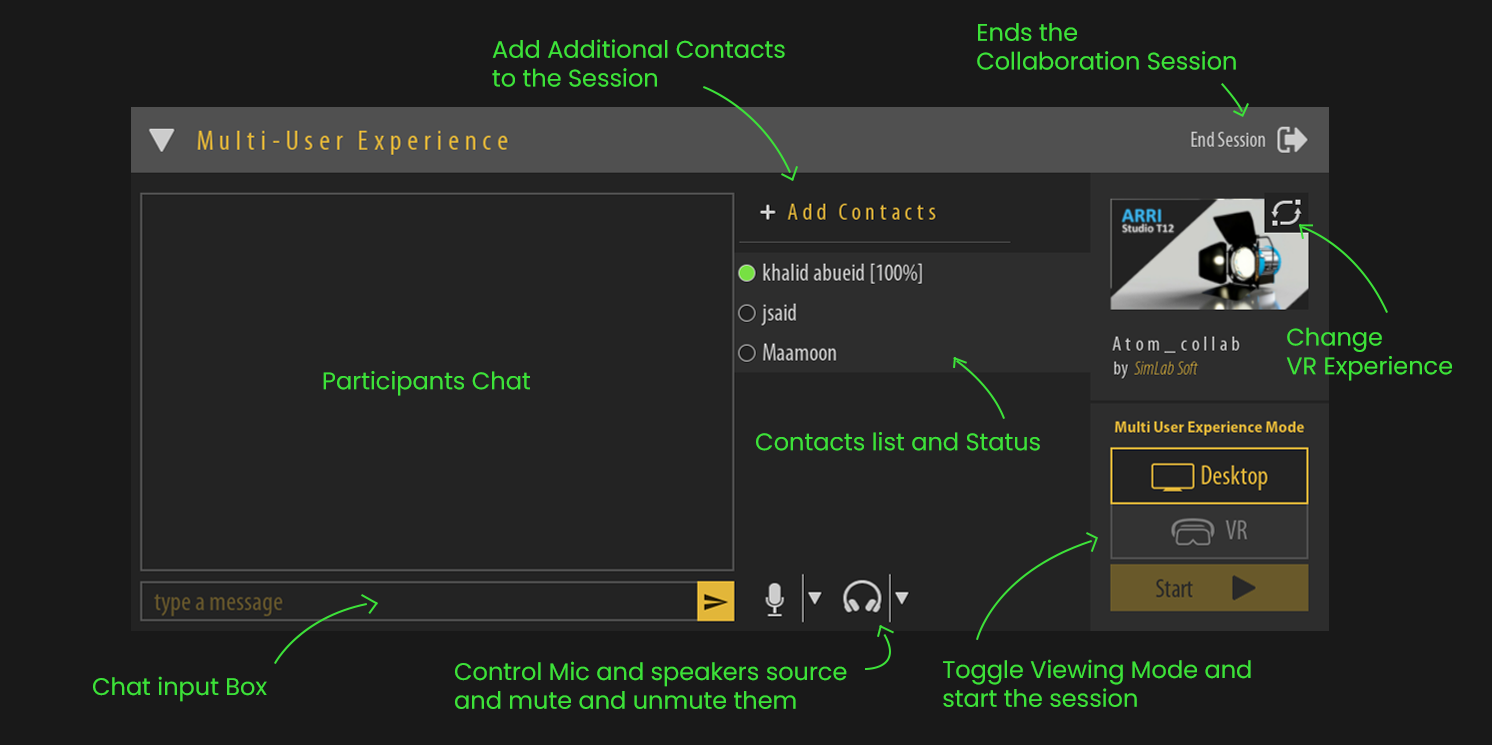
After specifying the contacts who are going to participate in the VR Collaboration session, the Collaboration Lobby Interface will appear at the bottom half of the SimLab VR Viewer, and a Collaboration invitation will be sent to all the specified contacts, once the contacts accepts the invitation in SimLab VR Viewer the indicator next to their names will turn green.
Starting the VR Collaboration session
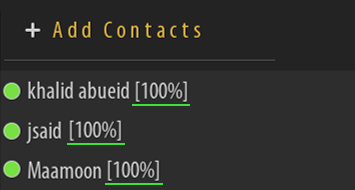
All the participants who have accepted the invitation will have a percentage meter next to their name, which measures their VR Experience download progress, so make sure that all the participants are at 100% before starting the VR Collaboration session.
To Start The VR Collaboration Session make sure that the desired viewing Mode (Desktop or VR) is selected and then click on the "Start" Button.
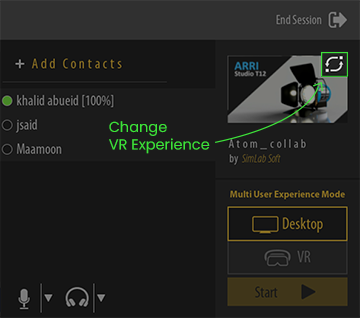
Note : If you wish to change the VR experience while in the lobby, you can select a new VR experience under My Models or Shared Models then click on the Change VR Experience icon at the top right corner of the collaboration VR Experience Thumbnail.

VR Collaboration Session Controls
When accessing the VR menu as a Host during a VR Collaboration Session, you will find multiple options that can be helpful at the bottom right corner of the screen in Desktop Mode, or near the VR Menu in VR mode.

Participants Interactions : Enables the participants interactions through triggering and grabbing or disabling them.

Mute Participants : Mutes all Participants and deny them the ability to use voice chat.

Mute Microphone : Mutes your own Microphone but other participants can still use voice chat.

Mute Speaker : Mutes your own speaker but other participants can still use voice chat.