
VR Menu
\\1DuringDuring the VR experience you can Display the VR menu to perform a variety of tasks, and whether you are in Desktop Mode or VR Mode, the functions within the menu are the same, but they are arranged differently to suit the platform you are using.
Accessing the VR Menu
To Display the VR Menu in Desktop mode : Press the middle mouse button or the Mouse wheel.
To Display the VR Menu in VR mode : Press the Menu button on the VR controller.
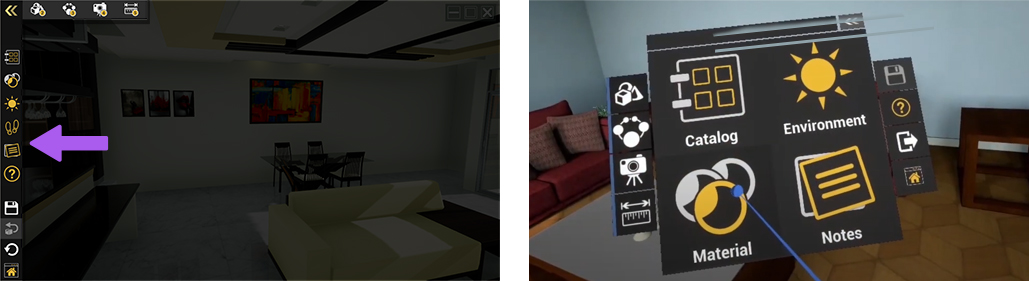
VR Menu in Desktop Mode (Left) appears to the left of the screen, while in VR Mode (Right) it appears in front of the user.
VR Menu Functions
 Catalogs
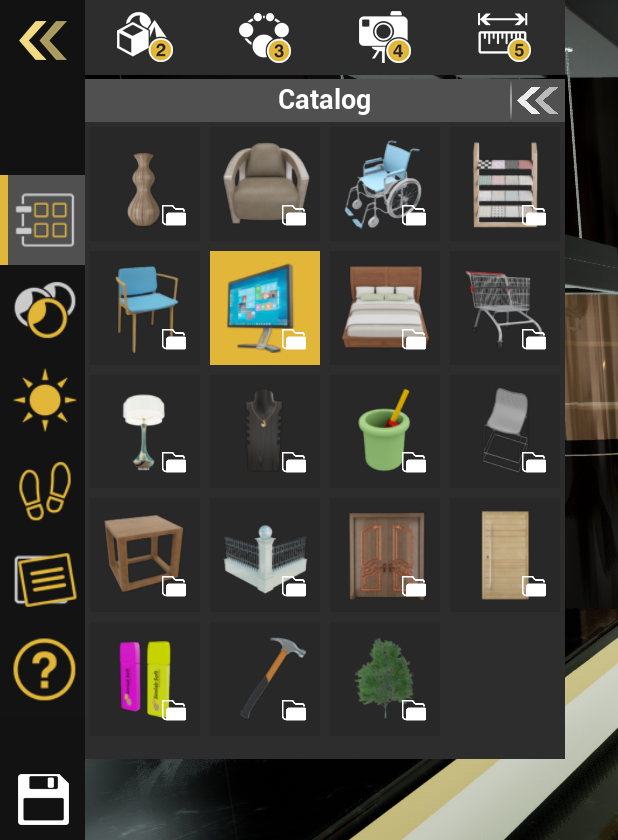
Catalogs when implemented in a VR experience, will include 3D Models that can be imported to the VR experience.
Upon selecting one of the models, it will begin downloading, and while it does so, you can position the model anywhere in the scene.
 Materials
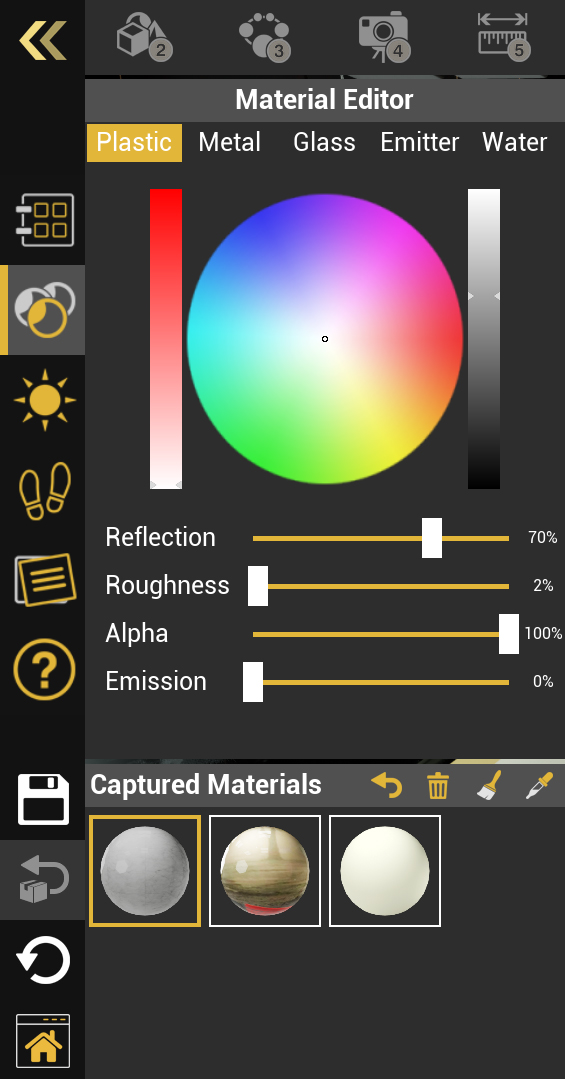
After accessing the material panel select an object in the scene to display its material, after which, you will be able to modify it.
Each material type available ( Plastic, Metal, Glass, Emitter and Water ) will have different attributes that you can modify to alter the appearance of the object.
From the Captured Materials panel, you can store materials that are used by objects in the scene as a palette and then apply the stored materials to other objects in the VR experience.
 Environment
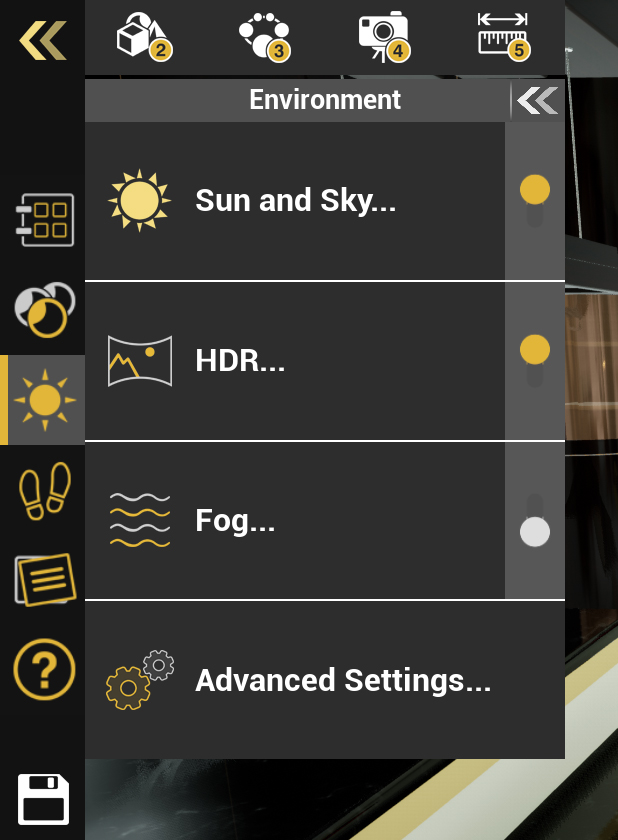
From the Environment Panel you can access the settings for :
- Sun and Sky
- HDR Image
- Fog
- Advanced Settings
You can also Toggle each of these systems on and off by pressing the switch to the right of each system.
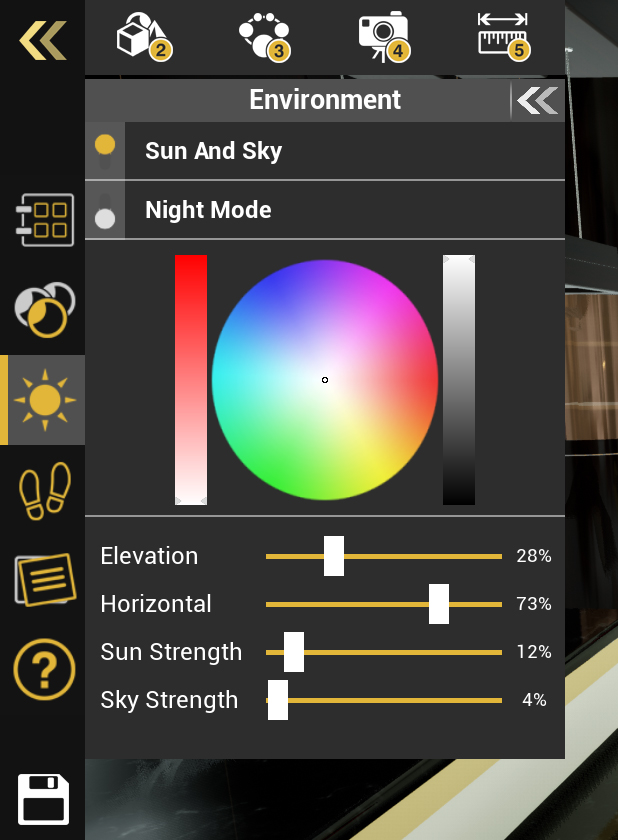
From the Sun and Sky sub-menu, you can toggle the system on or off, as well as enable night mode which would mimic a Night lighting environment.
you can also control the Sun and Sky Color hue by using the color wheel and the sliders next to it.
To control the sun's position in the sky, adjust the Elevation and the Horizontal sliders. Changing the sun's position will affect the Sun disc's location in the sky, as well as the direction of the light emitted by the sun.
The sun Strength controls the strength of the direct light rays coming from the sun, while the sky strength will affect the over all ambient light emitted from the sky.
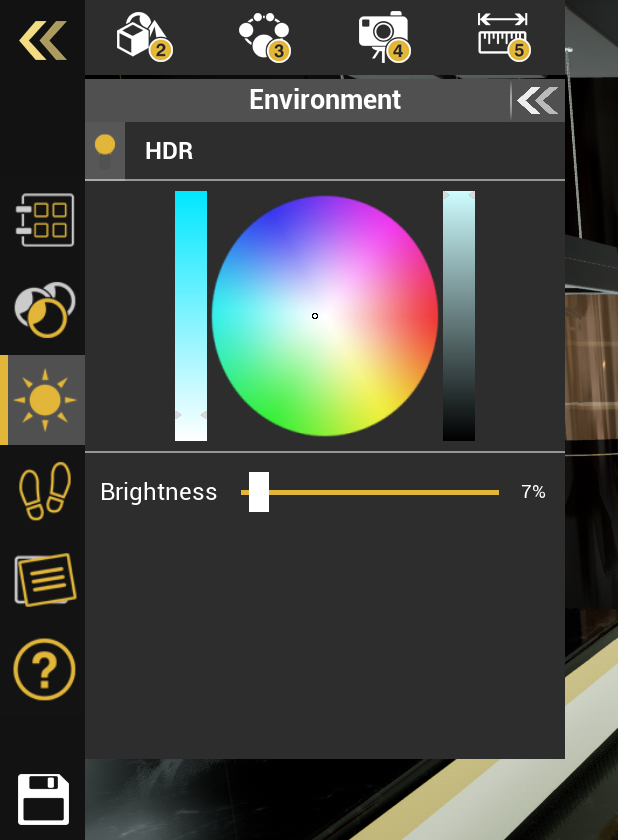
HDR images use Bitmap images to light the scene, and it can work together with the Sun and Sky system or independently from it.
In addition to color, you can also adjust the brightness of an HDR image.
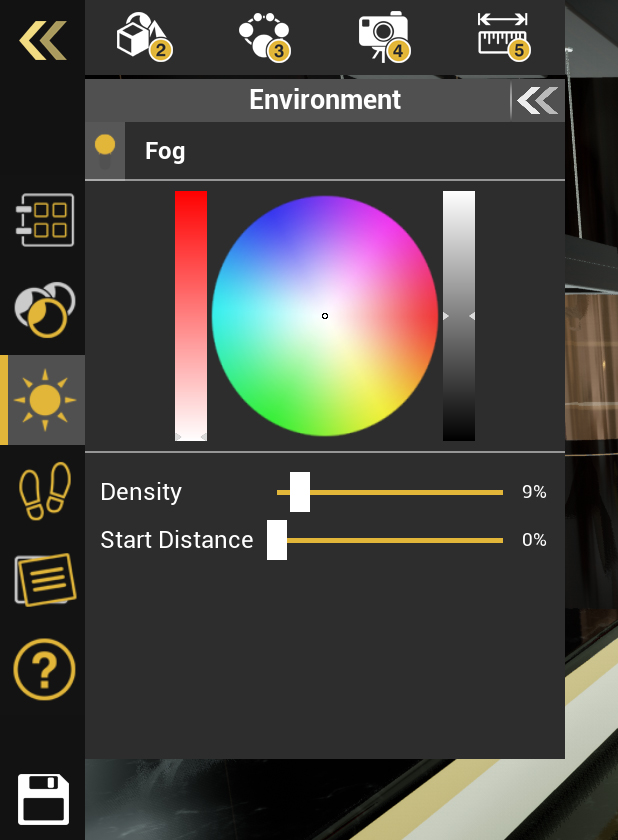
Fog is a volumetric environment effect that can make the natural phenomena of fog or haze in the scene.
you can also adjust the starting distance of the fog which controls how close to the user the fog is, and when set to 0, the fog starts where the user is standing in the VR experience.
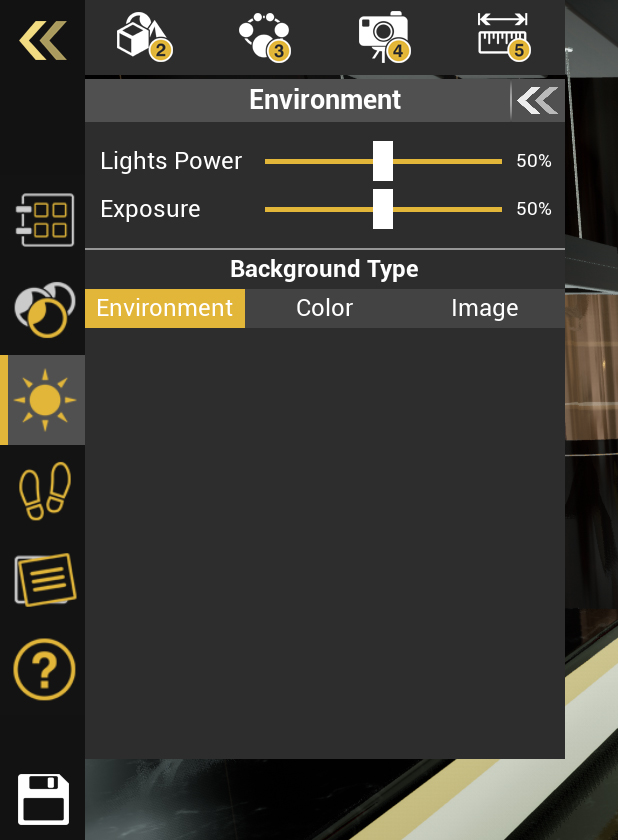
The Advanced Settings Menu of the Environment Settings will enable you to change the Lights Power in the VR Experience, which controls the strength of all artificial lights such as Spotlights, Area lights, IES lights and Point lights and it will not affect the Sun and Sky nor the HDR lighting.
Exposure, simply put, Controls the overall brightness of the VR experience, with higher values more brightness will be introduced to the scene, while with lower values, the scene would appear darker.
The Background type determines what backdrop to display in a VR experience. having it set to environment will either display the Sun and and sky or HDR image, while when set to color, a single solid color will be displayed, and with the Image option, a 2d Image will be displayed.